Here’s a tutorial on styling the header, to change colour on scroll in Elementor. This is based on if you’re using the Elementor pro header. So If you have not already done so, you will need to create a custom Header Template using the theme builder.
For the next steps we will be using the Advanced Tab in the Section Controls.
Step 1: Create a new header or edit an existing one with Elementor pro.
Step 2: Go to the “Advanced” tab of the header.
Step 3: Unlock the margin controls and set the bottom to a negative value (example: -120px). This will move the section that is below the header to move to the top of the page.
Step 4: You will also need to increase the Z-index of the section to make sure that it always remains on top of the content. Enter a high number, for example: 100.
Step 5: From the Motion Effects accordion, select the Sticky option from the dropdown and set to Top.

Now that we have a basic transparent header section created, we will add the scrolling effect. For the following steps we will be using the Style Tab in the Section Controls
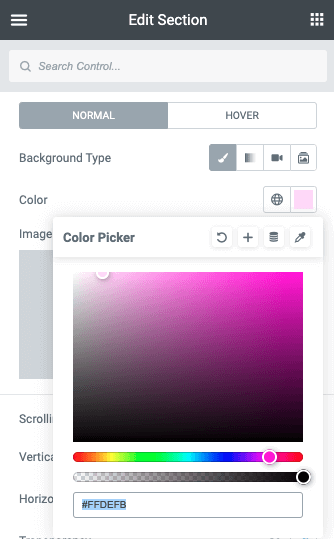
Step 6: From the colour picker, set the final background colour or gradient.
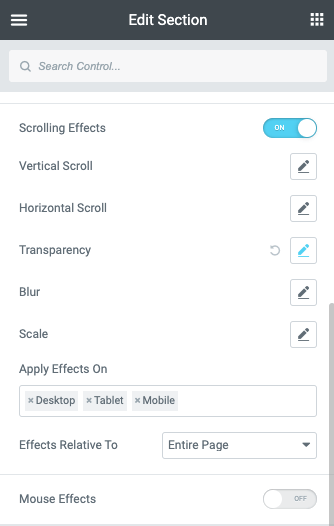
Step 7: From the controls panel, toggle the Scrolling Effects selector.
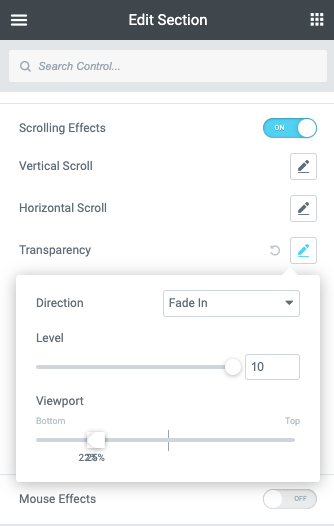
Step 8: To achieve the desired effect, change the settings in the viewport sliders. Reduce the Top value until your header is 100% opaque (for example, 25%) then scroll to the location on your page where you want the complete opacity.
The value of the Bottom may now be raised. In the aforementioned example, we want the effect to occur as rapidly as possible, therefore we’ll place the values fairly near together (for instance, 20%). As a result, the impact will unfold over a 3% page scroll.
Step 9: Save your changes and preview your page. You should now see your header change color when you scroll down the page.
