Setting up a professional email address ([email protected]) is essential for building credibility and brand identity. Fortunately, cPanel makes it easy to create and manage email accounts. In this guide, we’ll walk you through the process step by step.
Why Use a Custom Email Address?
Before we dive in, here’s why you should use a custom email:
Professionalism – Looks more trustworthy than free email services (e.g., Gmail, Yahoo).
Branding – Reinforces your business name every time you send an email.
Control – You own the email accounts, so you’re not at the mercy of third-party providers.
Step 1: Log in to cPanel
Go to your cPanel login URL (usually
https://yourdomain.com/cpanelor provided by your hosting provider).Enter your username and password.
Step 2: Find the Email Section
Once logged in, look for the “Email” section.
Click on “Email Accounts” to proceed.

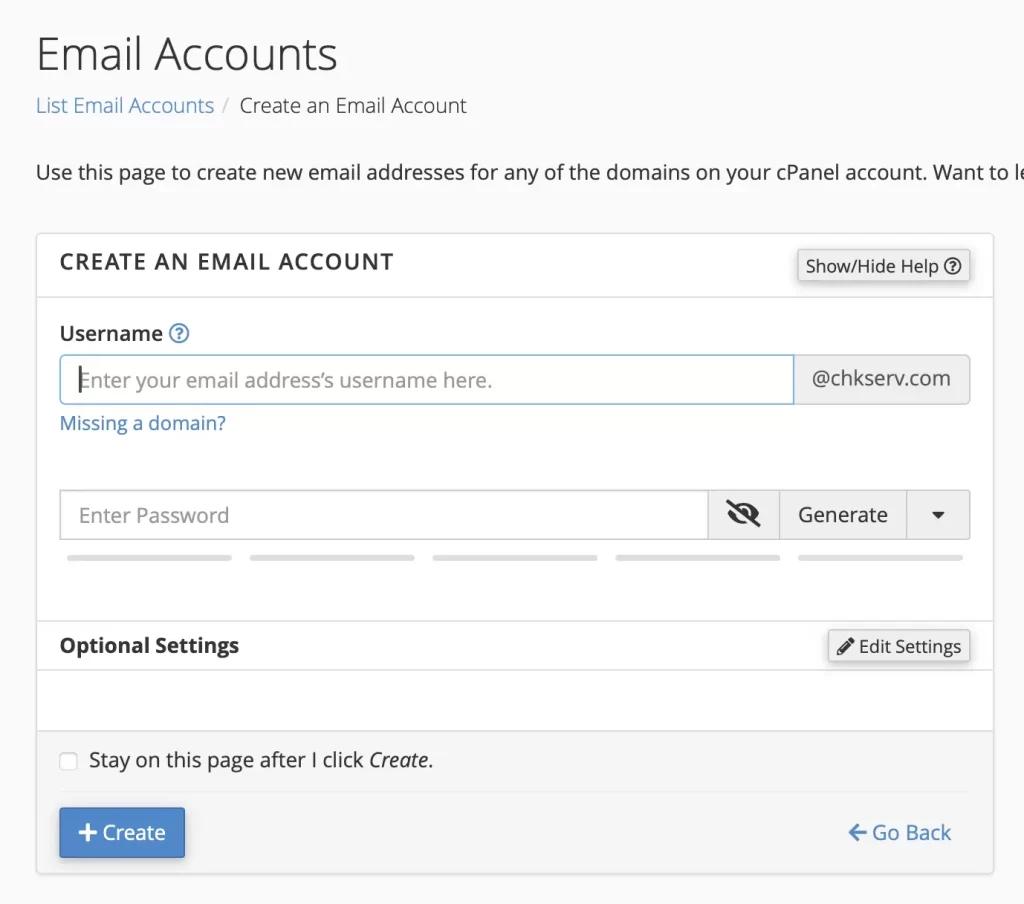
Step 3: Create a New Email Account
In the “Email Accounts” section, you’ll see a form to create a new email.
Enter the following details:
Email: Choose the prefix (e.g.,
info,support,yourname).Domain: Select your domain from the dropdown (if you have multiple).
Password: Set a strong password (or use the password generator).
Mailbox Quota: Set a storage limit (e.g., 5GB) or select “Unlimited” if available.
Click “Create” to finish.
Step 4: Access Your Email
Now that your email is set up, you can access it in three ways:
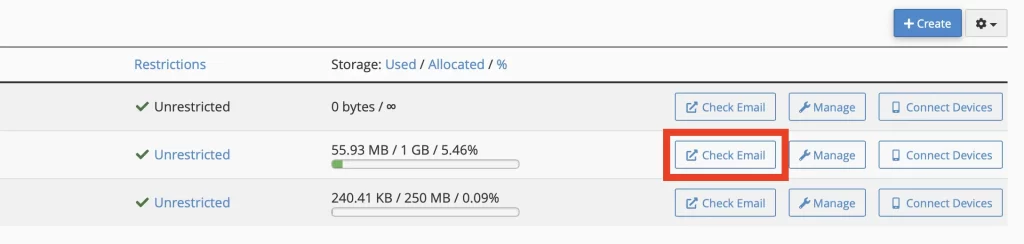
Option 1: Webmail (Roundcube)
Go back to cPanel’s “Email” section and click “Check Email” to the mailbox of your choice.
Select your preferred webmail client (we recommend Roundcube for a Gmail-like experience).
Log in using your full email address and password. It may auto-login, if available.
Option 2: Set Up Email on a Desktop Client (Outlook or Apple Mail)
To use your email in an app like Outlook or Apple Mail, you’ll need:
Incoming Server:
mail.yourdomain.com(IMAP)Outgoing Server (SMTP):
mail.yourdomain.comPorts:
IMAP: 993 (SSL)
SMTP: 465 (SSL) or 587 (TLS)
Final Thoughts
Setting up an email in cPanel is quick and straightforward. With a custom email, you’ll look more professional and build trust with clients. If you run into issues, most hosting providers offer support to help.
